Equipment Maintenance Checklist for Busy Season | DJ Products

When workloads increase, small equipment issues can quickly become operational downtime. Use this equipment maintenance checklist to review batteries, tires, controls, steering, attachments, wiring, hydraulics, and common wear items before busy season begins.

A weak battery, worn tire, loose connection, damaged hitch, or worn handlebar component may seem minor during a slower period. When the equipment is needed for a busy shift, however, that same issue can interrupt the job and take the unit out of service.

Routine inspections give your team time to identify wear, schedule service, and order needed parts before a small problem becomes a larger repair.

Important: This checklist applies as general guidance across the full line of DJ Products units. Components and maintenance requirements vary by product, model, and configuration, so not every check will apply to every unit. Always follow the owner’s manual for your specific equipment. Stop using a unit if you identify damage or a condition that could affect safe operation.

Quick Maintenance Summary
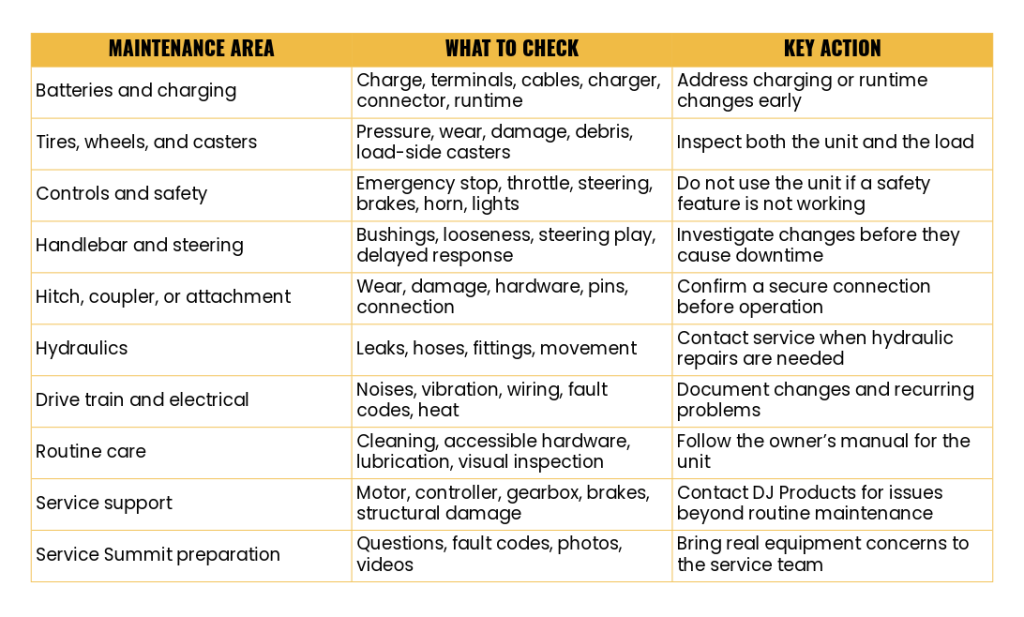
Quick Maintenance Summary Table

Small Part, Big Impact

The cost of a replacement part does not always reflect the amount of downtime it can cause.
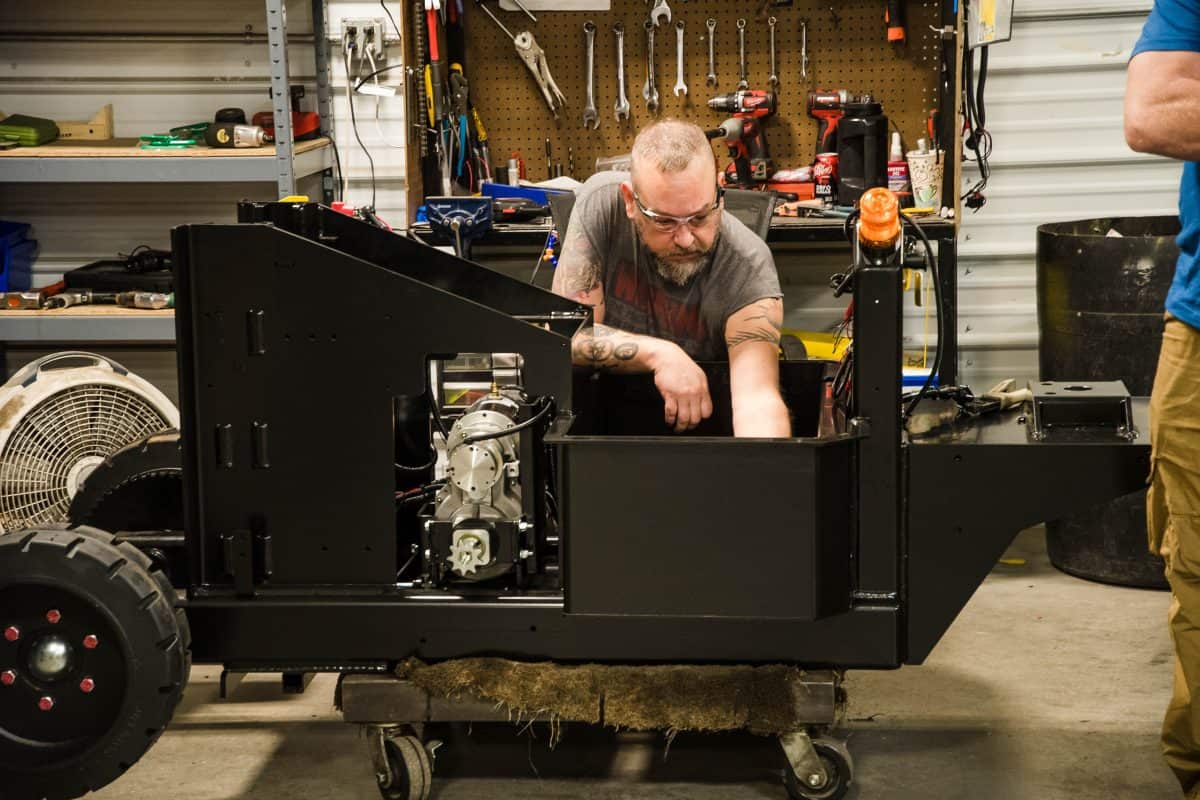
In one case reported by the DJ Products service team, a customer’s unit was down for approximately one week because it needed handlebar bushings that cost less than $20 at the time.
The parts were inexpensive. The operational impact was not.
This is why unusual looseness, movement, wear, or changes in equipment performance should be addressed early. It may also be helpful to ask the DJ Products service team which commonly replaced parts are worth keeping available for your specific units.

1. Check the Batteries and Charging System

Battery condition directly affects equipment performance and runtime. Checking the batteries and charging system early can help prevent unexpected interruptions during a busy shift.
Inspect the following:
  • Confirm that the batteries are fully charged.
  • Check battery terminals for corrosion or buildup.
  • Look for loose, damaged, or worn battery cables.
  • Inspect the charger and charging connector for visible damage.
  • Look for discoloration or signs of overheating.
  • Pay attention to any noticeable decrease in battery runtime.
  • Confirm that the charger is operating normally.
For units using lead-acid batteries, check the battery water level according to the battery manufacturer’s instructions and the owner’s manual.
A unit that is not holding a charge may have a battery problem, but the issue could also involve a damaged cable, loose connection, charger, or charging connector.
Document changes in runtime or charging behavior instead of waiting for the unit to stop operating completely.

2. Inspect Tires, Drive Wheels, and Casters

Tires and wheels affect traction, steering, control, and the amount of effort required to move a load.
Check for:
  • Proper tire pressure, when applicable
  • Cuts, cracks, flat spots, or visible damage
  • Uneven or excessive wear
  • Loose wheel hardware
  • Debris around wheels or axles
  • Worn drive wheels
  • Casters that do not rotate or swivel freely
  • Signs that the unit pulls to one side
Do not inspect only the DJ Products unit. The wheels and casters on the cart, trailer, vehicle, container, or other load should also be checked.
A damaged or poorly maintained caster can create additional resistance and make a properly operating unit appear underpowered.
Uneven or unusually fast tire wear may also indicate a steering, alignment, loading, or application issue that should be investigated.

3. Test the Controls and Safety Features

Before connecting the equipment to a load, test the controls and safety features in a clear, controlled area.
Check the following features when equipped:
  • Emergency stop
  • Other safety stop functions
  • Throttle
  • Forward and reverse controls
  • Steering
  • Braking response
  • Horn
  • Lights
  • Remote-control functions
  • Battery indicators
  • Warning lights
The throttle should respond smoothly without sticking, hesitating, or causing jerky acceleration.
Steering should feel controlled and should not have excessive play or looseness.
Do not continue using the equipment if a safety feature is not working properly. A unit that does not respond safely and predictably should be removed from service until the issue has been addressed.

4. Check the Handlebar and Steering Components

Handlebar and steering components should feel secure and respond consistently.
For units equipped with a handlebar, inspect for:
  • Excessive side-to-side movement
  • Loose or worn handlebar bushings
  • Movement between connected handlebar components
  • Controls that shift or move unexpectedly
  • Loose accessible hardware
  • Difficulty controlling the unit
Also watch for:
  • Excessive steering play
  • Delayed steering response
  • Difficulty turning
  • Grinding or clicking while steering
  • The unit pulling to one side
  • Tires rubbing against nearby components
The handlebar bushing example from the DJ Products service team shows how a small wear item can create significant downtime when it is not identified or replaced early.
When the handlebar or steering begins to feel different from normal, document the change and have the unit inspected.

5. Inspect the Hitch, Coupler, or Attachment

The connection between the unit and the load is an important part of safe, controlled operation.
Inspect the hitch, coupler, or attachment for:
  • Cracks, bends, or visible damage
  • Excessive wear
  • Loose or missing hardware
  • Damaged pins or retaining components
  • Latches that do not close or lock properly
  • Excessive movement at the connection point
  • Misalignment between the unit and the load
  • Damage to custom attachment components
Make sure the connection is secure before beginning a move.
Capacity matters, but the connection method also affects how the operator controls the load while starting, stopping, and turning.
If an attachment appears damaged or no longer connects securely, stop using it until it has been inspected.

6. Look for Hydraulic Leaks

For units equipped with hydraulics, inspect the system for visible signs of leakage or damage.
Check for:
  • Fluid under or around the unit
  • Wet areas near hydraulic fittings
  • Cracked, worn, or damaged hoses
  • Loose fittings
  • Slow or inconsistent hydraulic operation
  • Unusual sounds during hydraulic movement
Hydraulic systems operate under pressure. Do not use your hands to search for a hydraulic leak, and do not attempt hydraulic repairs unless you are trained and authorized to complete them.
Contact DJ Products if a hydraulic component is leaking, damaged, or operating inconsistently.

7. Listen to the Gearbox, Brakes, and Drivetrain

Operators often notice the first warning signs through changes in the way the equipment sounds, feels, or responds.
Listen and watch for:
  • Grinding
  • Clicking
  • Whining
  • Squealing
  • Excessive vibration
  • Reduced pulling or pushing power
  • Delayed movement
  • Inconsistent speed
  • Changes in braking performance
  • Unexpected stopping
A new sound or vibration should be documented, even when the unit still appears to operate.
A short video can be especially helpful. Record the sound and show what the equipment is doing when the issue occurs. This gives the DJ Products service team more information to use during troubleshooting.

8. Inspect Wiring and Electrical Connections

Look over all accessible wiring and connectors for obvious signs of damage.
Check for:
  • Loose electrical connections
  • Rubbed-through insulation
  • Pinched or damaged wires
  • Corrosion
  • Discolored connectors
  • Exposed wiring
  • Signs of overheating
  • A burning smell
  • Unusually hot electrical components
Stop using the unit if you notice a burning smell, damaged wiring, smoke, or excessive heat around an electrical component.
Only complete basic electrical maintenance that is specifically covered in the owner’s manual. Motor, controller, or recurring electrical problems should be handled by DJ Products or qualified service personnel.

9. Tighten Accessible Hardware and Remove Debris

Normal operation can cause accessible hardware to loosen over time. Dirt and debris can also build up around moving components and affect performance.
During the inspection:
  • Check accessible bolts and hardware.
  • Look for missing fasteners.
  • Remove dirt and built-up debris.
  • Clean around wheels and moving components.
  • Inspect guards and covers.
  • Make sure safety labels remain visible.
  • Lubricate approved grease points according to the owner’s manual.
Only use the lubrication points and products specified for your equipment.
Do not remove safety guards or disassemble components unless the procedure is included in the manual and your team is qualified to complete it.

Warning Signs That Should Not Be Ignored

A change in equipment performance may be an early sign that maintenance or service is needed.
Watch for:
  • Reduced pulling or pushing power
  • Batteries that do not last as long as they previously did
  • Grinding, clicking, or whining noises
  • Jerky acceleration
  • Inconsistent speed
  • The unit pulling to one side
  • Excessive vibration
  • Hydraulic leaks
  • Warning lights or fault codes
  • A burning smell
  • Unusually hot electrical components
  • Uneven or unusually fast tire wear
  • Recurring charging problems
  • Controls that stick, hesitate, or respond unpredictably
  • Excessive movement in the handlebar or steering components
  • Loose or worn bushings
Continuing to use equipment with a recurring issue may allow a smaller problem to become a more complicated repair.
Stop and investigate any condition that affects safe, controlled, or predictable operation.

Maintenance Customers Can Typically Perform

Trained operators and maintenance personnel can complete many basic checks without disassembling the equipment.
Routine customer maintenance may include:
  • Performing a visual inspection before use
  • Checking the battery charge
  • Cleaning battery terminals
  • Checking tire pressure and condition
  • Cleaning the equipment
  • Removing built-up dirt and debris
  • Inspecting accessible wiring and connectors
  • Tightening accessible hardware
  • Lubricating approved grease points
  • Testing the horn, lights, and emergency stop
  • Checking for visible leaks or damage
  • Checking the handlebar and steering for unusual looseness
Always follow the instructions for the exact model being inspected.
Do not attempt a repair when the procedure, required tools, or safety steps are unclear.

When to Contact DJ Products

Some equipment problems require specialized diagnostic work, replacement components, or trained service personnel.
Contact DJ Products for assistance with:
  • Electrical problems beyond routine maintenance covered in the owner’s manual
  • Motor or controller problems
  • Gearbox or differential repairs
  • Hydraulic component repairs
  • Brake repairs that require disassembly
  • Persistent fault codes
  • Recurring problems that return after routine maintenance
  • Structural damage
  • Damage that may affect safe operation
  • Warranty-related concerns
  • Any issue your team is unsure how to address
When contacting the service team, have the following information available when possible:
  • Equipment model
  • Serial number
  • Fault code
  • Description of the problem
  • When the problem occurs
  • Recent maintenance or repairs
  • Photos or videos of the issue
Clear information can help the service team understand what is happening and determine the appropriate next step.

Suggested Equipment Maintenance Schedule

The following schedule is a general starting point based on guidance from the DJ Products service team. Always follow the owner’s manual when it includes more specific requirements.

Before Each Use

  • Walk around the unit.
  • Check the battery charge.
  • Inspect tires and wheels.
  • Test safety features.
  • Check the throttle and controls.
  • Check the handlebar and steering.
  • Look for leaks.
  • Look for visible damage.
  • Listen for unusual sounds.

Weekly

  • Clean the equipment.
  • Remove built-up debris.
  • Inspect battery terminals.
  • Inspect accessible wiring.
  • Check steering and handlebar components.
  • Check the hitch, coupler, or attachment.
  • Review concerns reported by operators.

Monthly

  • Lubricate approved grease points.
  • Inspect accessible drivetrain components.
  • Check the charger and charging connector.
  • Review tire wear.
  • Check accessible hardware.
  • Confirm that the equipment is operating normally.

Every 6 to 12 Months

  • Complete a more thorough preventive maintenance inspection.
  • Test battery performance.
  • Inspect the gearbox and drivetrain.
  • Review the condition of the brakes and hydraulic system, when equipped.
  • Inspect common wear items.
  • Replace worn components before they create larger problems.
Equipment that is used frequently, operates under demanding loads, or works in harsh conditions may require more frequent inspections.

Consider Which Spare Parts to Keep on Hand

The handlebar bushing example shows that downtime is not always caused by an expensive component or a major repair.
A low-cost wear item can still take a unit out of service when the correct replacement part is not available.
Because parts requirements vary across the DJ Products product line, customers should speak with the service team about which common parts may be appropriate to keep on hand for their specific equipment.
Having the right model-specific parts available can help reduce delays and prevent a minor maintenance need from interrupting operations for several days.

Prepare for Service Summit 2026

Preventive maintenance and troubleshooting will be important parts of the DJ Products Service Summit on September 16 and 17, 2026, at the DJ Products manufacturing facility in Little Falls, Minnesota.
Planned maintenance and troubleshooting topics include:
  • Preventive maintenance practices that help reduce downtime
  • Battery care and battery life
  • Proper charging practices
  • Diagnosing common electrical problems
  • Motor and controller troubleshooting
  • Drivetrain and gearbox inspections
  • Brake maintenance
  • Hydraulic maintenance
  • Identifying small problems before they become larger repairs
  • Recommended spare parts to keep on hand
  • Live troubleshooting demonstrations
  • Open Q&A with the DJ Products service team
Before the Summit, inspect the equipment your team uses most often. Write down recurring problems, unusual noises, fault codes, charging concerns, loose components, or changes in performance.
Registered attendees are also encouraged to bring photos or videos of equipment issues they have experienced.
It is often easier to understand a problem when the service team can see or hear what is happening. These real examples can also support more practical conversations during the live troubleshooting sessions.

Inspect Early and Keep Your Equipment Ready

Busy season is easier to manage when your equipment is prepared for the increased workload.
A consistent inspection routine can help your team identify wear, schedule service, order needed parts, and reduce preventable downtime.
Start with the basic checks in this guide, follow the maintenance instructions for your specific unit, and contact DJ Products when an issue requires additional support.
For Service Summit attendees, bring your equipment details, maintenance questions, fault codes, photos, and videos. The more information the service team has, the more productive the troubleshooting conversation can be.
DJ Products service technicians can also provide live video support to help diagnose equipment issues. A DJ Products technician can join a video call while your technician is on-site, view the unit and symptoms in real time, and help guide the troubleshooting process. Have the unit’s model, serial number, fault codes, and a description of the issue available before the call.
Some repairs may still require additional testing, replacement parts, or qualified service personnel. If the issue cannot be safely resolved remotely, the DJ Products service team can recommend the appropriate next steps.
Need help diagnosing an equipment issue? Contact the DJ Products service team to discuss available troubleshooting support.
Your Flatbed Cart Is Costing You More Than You Think

If you’ve spent time on a warehouse floor or in a production facility, you’ve seen it: a worker leaning hard into a heavy cart, shoulders twisted, fighting to steer it around a corner. Maybe you’ve heard the complaints about sore backs, tired arms, or near-misses in tight corridors.

This isn’t just a comfort issue. It’s a productivity problem, a safety liability, and in many cases, the root cause of costly workers’ comp claims and equipment damage.

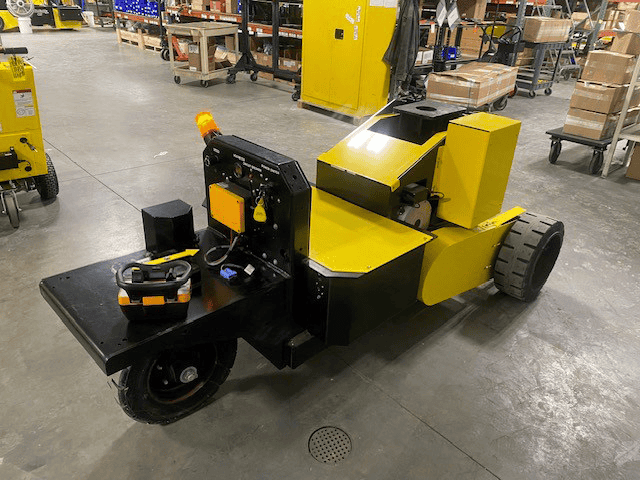
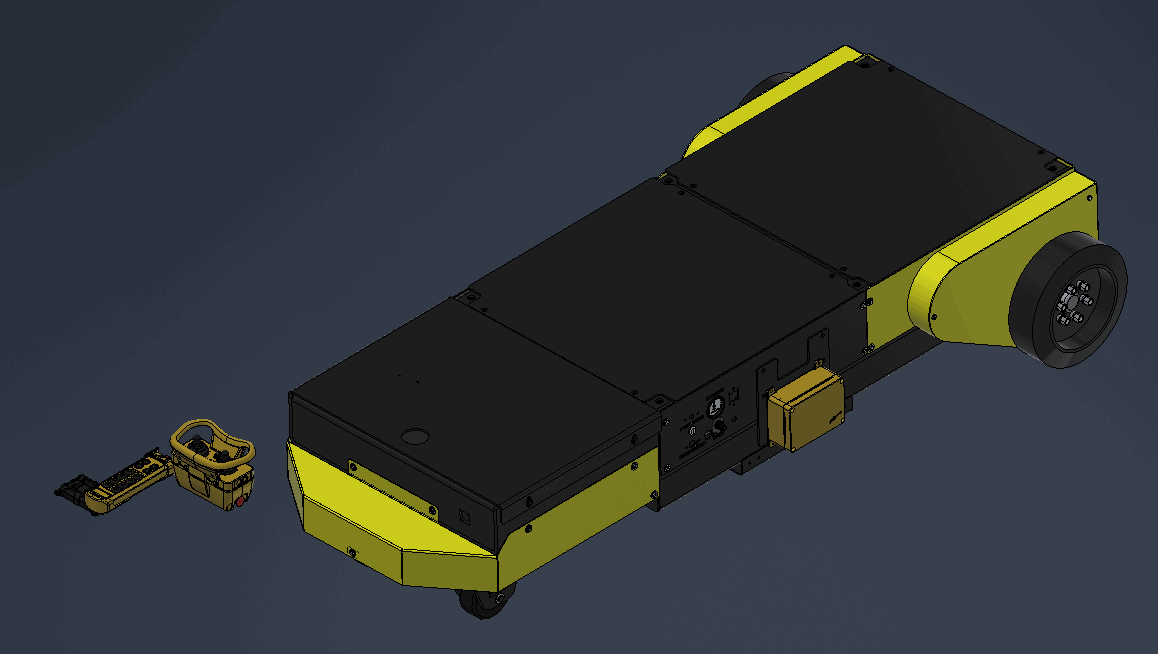
At DJ Products, we’ve spent decades building powered material handling equipment for exactly these situations. Our latest solution, the Flatbed Chaindrive Remote Steer, was designed specifically for operations that need to move heavy loads through confined spaces, without putting workers’ bodies at risk.

The Real Cost of Manual Material Handling

It’s easy to underestimate what manual maneuvering actually costs your operation. Beyond the obvious ergonomic risks, there are slower cycle times, fatigued workers making poor decisions, and the constant risk of damaging loads, equipment, or infrastructure.

When the loads get heavy, the problem multiplies. Moving anything over a few thousand pounds by hand, even on a wheeled cart, demands significant physical force. Steering a flat cart loaded with machinery or materials through a production line, loading dock, or narrow aisle is a two-person job at minimum. And even then, control is limited.

These are exactly the conditions the Flatbed Chaindrive Remote Steer was built for.

What the Flatbed Chaindrive Remote Steer Actually Does

The unit is a powered, remotely steered flatbed transport platform. Material is loaded on top of the flat deck, the worker picks up the wireless remote transmitter, and drives the load where it needs to go. No pushing, no pulling, no strain.

The standard configuration handles loads up to 5,000 lbs. For operations dealing with heavier equipment, the optional 3HP 36VDC drive system scales capacity up to 10,000 lbs. Either way, the operator stays in control at all times, walking beside the unit and steering it with precision.


Key specs at a glance:

  • Load capacity: 5,000 lbs standard (10,000 lbs with upgraded drive)
  • Speed: 0-2 mph forward and reverse
  • Power system: 36VDC electric, three 12V batteries
  • Drive: 1HP continuous (6HP peak), chain-driven to front tires
  • Dimensions: 78.75″ L x 40.5″ W x 15″ H
  • Machine weight: 1,054 lbs with batteries
  • Controls: Handheld wireless remote or optional belly box transmitter
  • Charging: 4.5A onboard charger (15A 3-bank upgrade available)
  • Battery run time: Approximately 8 hours per full charge (2-3 hours at max load)

Designed with Safety at the Center

One of the most common questions we get is about what happens when something goes wrong. The Flatbed Chaindrive Remote Steer is built with a dedicated Emergency-Stop switch on the remote transmitter. Press the red button, and the machine comes to a controlled stop immediately. The motor brake is applied, and the unit won’t move again until the E-Stop is manually released and power is cycled.The system also features a key-switch power control, a main circuit breaker for motor overload protection, and an accessory circuit breaker for the control circuit. An onboard voltmeter lets operators check battery state at a glance before a shift starts.

Optional features include a strobe safety light and an audible horn, both designed to alert nearby workers whenever the unit is in motion.

Who This Unit Is Built For

The Flatbed Chaindrive Remote Steer works best in environments where you have heavy, evenly distributed loads that need to move through spaces that don’t accommodate a forklift. Think:

  • Manufacturing facilities moving large assemblies between workstations
  • Palletized freight repositioning in distribution centers
  • Heavy equipment transport for maintenance shops and service bays
  • Healthcare and institutional settings managing large wheeled loads
  • Any operation where operator fatigue or injury risk is a known concern

The Invert Drive Function: A Detail Worth Knowing

One small but genuinely useful feature is the Invert Drive function. If the operator is positioned on the opposite side of the unit from where steering typically originates, they can hold the Invert Drive button for three seconds to flip the drive direction. This makes it much easier to navigate the unit in and out of tight spaces without repositioning yourself.

Starting the Conversation

Every facility is different. Load weights, aisle widths, surface conditions, shift lengths, and workforce considerations all affect what the right unit looks like for a given application.That’s why we don’t just sell equipment. We talk through the details with you first. The DJ Products sales team has seen hundreds of different applications and can help identify whether the standard configuration covers your needs, or whether an upgraded drive system, alternate battery setup, or custom bed configuration makes more sense.

Ready to see what the Flatbed Chaindrive Remote Steer can do for your operation? Call us at 800-686-2651or request a demo.

Aircraft Caddy 15K Magic Arm for Safe Aircraft Moves

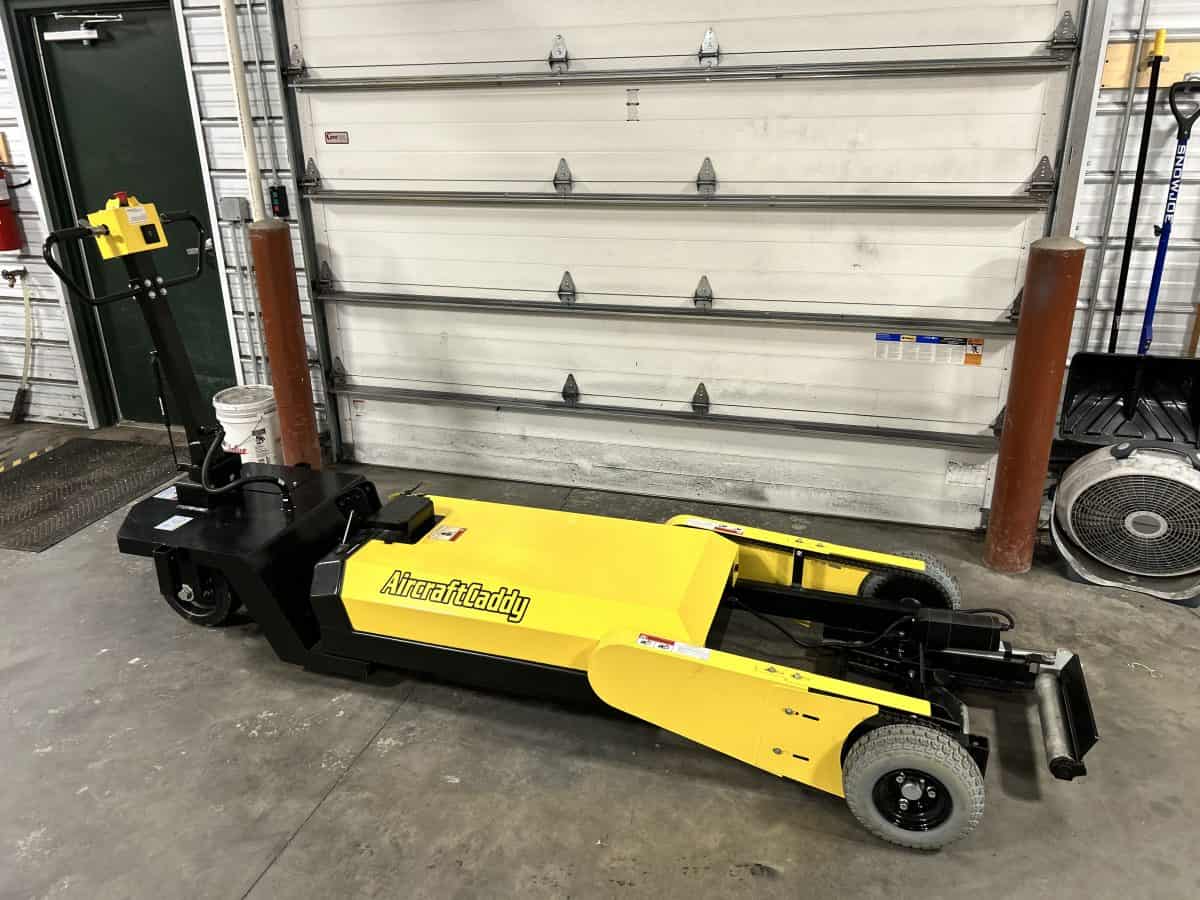
Tight hangars leave no room for hesitation. When clearance is limited, the right tug can make the difference between a smooth move and unnecessary stress. The Aircraft Caddy 15K Magic Arm gives one operator a safer, easier way to load and maneuver aircraft up to 15,000 lbs in tight spaces, hangars, and ramp staging areas.

Why the Aircraft Caddy 15K Magic Arm stands out

The strength of this unit is not just its pulling power. It is the way it improves control at every step of the move. The Magic Arm uses an electric actuator to power load the aircraft, helping reduce manual effort while giving the operator a more controlled way to position and move the aircraft.

  • One operator can safely load and maneuver aircraft up to 15,000 lbs.
  • Powered loading helps reduce manual effort during aircraft positioning.
  • Variable speed control, neutral throttle braking, and adjustable acceleration and braking support smoother starts and stops.
  • Quiet electric operation helps the operator stay more aware of the aircraft and surrounding space.

Built for precise aircraft movement

The Aircraft Caddy 15K Magic Arm is engineered for steady, predictable handling. It combines a heavy-duty steel frame, 36VDC drive system, 2:1 gear reduction, variable speed twist grip control, and 0 to 2 mph forward and reverse travel to help the operator move with precision instead of rushing the job.

That precision carries into the safety side of operation as well. When the unit powers on, the controller runs internal diagnostics. If the handlebars are out of neutral, the tug will not respond until they return to neutral. When the operator releases the handlebars, the unit comes to a quick but smooth stop and holds position with an electric brake.

Built for day-to-day use

This is a commercial-use machine designed for repeat aircraft handling. It runs on a three-battery 36V system, delivers nominal power of 1 hp with 2 hp peak, and provides maximum drawbar pull of 800 lbs. It also includes an onboard charger and battery discharge indicator to support daily use.

A full charge provides about eight hours of runtime, and the charger automatically shuts off when the batteries are fully charged. That makes the Aircraft Caddy 15K Magic Arm practical for daily operations without adding unnecessary complication.

Why it is a smart buy

Buying the Aircraft Caddy 15K Magic Arm means buying better control. For teams that move aircraft regularly, that means a more consistent way to handle valuable aircraft with less manual strain and more confidence.

  • It helps reduce the labor needed to move aircraft in tight spaces.
  • It gives operators more precise low-speed control during loading, maneuvering, and final placement.
  • It supports safer movement with startup diagnostics, neutral-position protection, and controlled electric braking.
  • It is built for commercial use, not occasional convenience.

Options that help match the job

The Aircraft Caddy 15K Magic Arm can be configured to better fit demanding environments. Available options include a nine-tooth gear option for heavier planes, inclines, or bumps that increases torque by 2.5x while reducing speed, along with manual or electric winch options, a safety stop switch, molded handlebar, virtual training, and a lithium battery option.

A practical fit note

Before buying, it is smart to confirm the aircraft nose wheel setup and turning limits. The Magic Arm configuration can interfere with wheel pants, and turning radius is limited by the aircraft’s nose gear turning limits.

Ready to move aircraft with more control?

Talk with DJ Products about the right Aircraft Caddy 15K Magic Arm setup for your aircraft and operating environment. Because towing capacity can vary based on surface conditions, load weight, wheel type, and other application details, a quick review helps match the right power and option package from day one. Call 800-686-2651 to get started.

Get a quote on the Aircraft Caddy 15K Magic Arm and spec the right unit for your operation today.

15K Remote Steer: One-Operator Trailer and Cart Mover

Every facility has the same pressure: move more, faster, with fewer people and less risk. Trailer moves are an obvious pain point, but they’re not the only one. Cart moves, staging moves, and repositioning wheeled equipment also eat time and tie up manpower. The 15K Remote Steer is designed to solve that problem with one-operator, remote-controlled steering and the power to move heavy loads with precision.

The operational problem: trailer and cart moves create delays and damage

Trailer and cart repositioning rarely shows up as a line item until it starts costing you. Common symptoms include:
  • Multiple people pulled into one move
  • Equipment being “borrowed” (and unavailable for real work)
  • Tight turns that lead to bumps, scrapes, and rework
The fix is simple: control the move with the right machine. The 15K Remote Steer is built for easy turning and intricate maneuvering, so the operator can walk with the load and place it accurately.

What the 15K Remote Steer is

The 15K Remote Steer is a battery-powered, remote-controlled caddy engineered to move heavy trailers, carts and other material handling equipments with controlled, low-speed precision.
Two models are available:
  • 15K Remote Steer 36V — made to move up to 59,700 lbs
  • 15K Remote Steer 48V — made to move up to 108,100 lbs
Both models include key performance features customers ask for:
  • Proportional Remote Control
  • 0–2 mph forward & reverse for controlled positioning
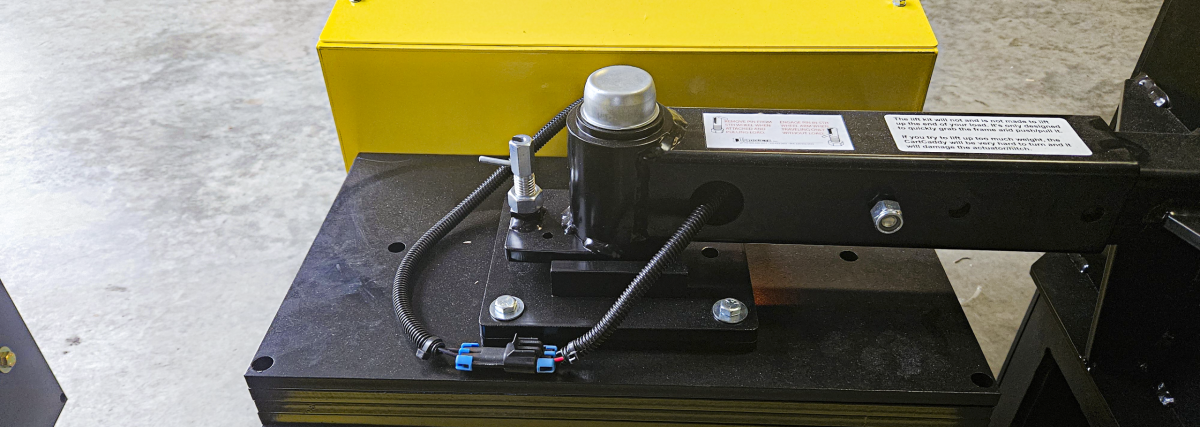
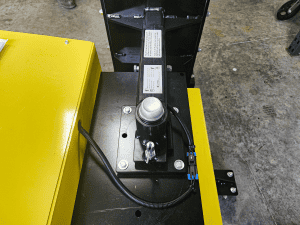
  • 15,000 lb, 10″ hydraulic pump lift kit for coupling and moving trailers once hitched
*Important note: the hydraulic lift is designed to couple and transport.. it is not for general lifting duties.

Why it matters beyond the trailer yard

Trailer handling and material handling overlap more than most people admit. Your team is constantly moving wheeled loads through limited space while trying to protect people, product, and infrastructure.
The 15K Remote Steer supports multiple hitch styles depending on model and options. That includes ball, pintle, king pin, and gooseneck. It also supports custom engineered attachments. That is how the platform can extend beyond traditional trailer moves.
If your operation moves cart trains or specialized carts, the right engineered attachment can create a controlled connection point so you can tow cart style loads safely and consistently. The goal is not to force a one size fits all solution. The goal is to standardize on a proven powered mover, then match the hitch and attachment to the loads you move every day.

Where it delivers ROI fast


Dock doors and staging lanes
Space is limited. Time is limited. With proportional remote steering and 0–2 mph control, operators can make clean placement adjustments without repeated back-and-forth corrections.
Maintenance bays and indoor positioning
The 15K Remote Steer is designed for intricate maneuvering indoors and on semi-improved outdoor surfaces, ideal for positioning equipment where a truck or forklift is inconvenient or oversized for the job.
Storage yards and congested lots
When the yard is packed, the fastest operational win is converting “hard moves” into one-person moves without tying up high-value equipment.

Will it work in your environment?

Application matters. For predictable performance, focus on the fundamentals: surface, slope, and conditions.
The intended use environment is indoor and outdoor operation with no precipitation and low winds. Surfaces should be flat and smooth such as concrete or asphalt, or hard packed gravel rated to handle bearing pressure. Maximum operating slope is 2 percent.
If your facility has steep grades, poor surfaces, or extreme conditions, the right approach is to review your environment with a DJ Products specialist so the configuration matches real world use.

Battery runtime and charging

Battery planning is part of keeping uptime high.
Under typical conditions, runtime can be about eight hours when fully charged. Moving very heavy loads will reduce runtime. Operating at maximum power can drain batteries significantly faster. Best practice is to plug the unit in once it is no longer in use, or at the end of a shift, so it is ready for the next move cycle.
If you run continuous high volume moves, it is worth discussing battery options and charging routines up front so your team is never waiting on a charger.

Configuration options that make it fit your workflow

These are common add-ons so you can spec the unit like it was built for your yard:
  • King pin receiver options
  • Ball/pintle bracket assemblies & pintle hook inserts
  • Safety light assembly
  • Battery upgrades (including AGM options)
  • 18″ dual steer wheel option
  • Fully enclosed chain guards
  • Belly box transmitter options (and combo setups)
  • Custom engineered attachments
That last category is where flexibility comes from. Custom engineered attachments are how you adapt the platform to non standard trailer connections and cart style applications, when the move requires a purpose built interface.

A practical ROI example

Here is a simple way to evaluate payback.
If you reposition loads 10 times per day and each move currently consumes 15 minutes of combined labor and equipment time, that is 150 minutes per day.
If a one operator remote steer process reduces the average move to 8 minutes, you save 70 minutes per day. At a loaded labor cost of $35 per hour, that can translate to roughly $10,000 per year over 250 workdays, before considering avoided damage, improved flow, and reduced equipment conflicts.
The point is not to promise a universal number. The point is that small time savings, repeated daily, create real operating leverage.

Choosing 36V versus 48V

  • Choose the 36V model when your loads and conditions align with the 59,700 lb rating and you want a strong standard configuration.
  • Choose the 48V model when you need higher capacity up to 108,100 lb and you want additional drive power for demanding applications.
Rated towing capacities are estimates. Real world factors like surface conditions, load weight, wheel type, and bearing friction affect the force required to move a load. That is why the right next step is a quick application review.

Next step

If you want faster trailer placement, fewer people pulled into moves, and a more controlled handling process, the 15K Remote Steer is built for that job.
If you also want one powered platform that can support trailer moves and cart style material handling with the right engineered attachment, that is a conversation DJ Products can help you have quickly and accurately.
Call DJ Products at 800-686-2651 to spec the right 15K Remote Steer configuration for your facility.


The AircraftCaddy 8K Magic Arm: Stop Wrestling Airplanes in Tight Hangars

The problem nobody brags about

Moving an aircraft a “few feet” is never just a few feet.

It turns into a slow-motion shuffle, two people pushing in awkward angles, hoping the tow bar does not slip, and praying the wingtip clears that one post you forgot was there.

Hangars are tight. Ramps get busy. Labor is expensive. So the question becomes simple: how do you move aircraft safely and efficiently without turning every reposition into a production?

The solution: one person, battery power, real control

The AircraftCaddy 8K Magic Arm is a battery-powered AircraftCaddy designed to help one person load and maneuver aircraft up to 8,000 lbs in and out of tight spaces, hangars, or for staging on the ramp.

This is not about showing off gear. It is about getting aircraft positioned faster, with fewer hands, and with less “hangar gymnastics.”

Why the Magic Arm 8K makes money

How many headaches and labor hours does this remove from your week?

Here is where the ROI usually shows up:

1) Fewer people tied up per move

When one operator can handle routine positioning, your second person stays on higher-value work (fueling, cleaning, line service, maintenance support, customer turnarounds).

2) Faster hangar flow and ramp staging

If you manage multiple aircraft, small delays stack up. Tight control and predictable movement helps you keep the hangar flowing and the ramp less congested.

3) Less stress in close quarters

Tight spaces punish sloppy movement. The Magic Arm 8K is built around controlled maneuvering, not “hope and shove.”

What operators like about the way it drives

The Magic Arm 8K is built with practical features that matter in real hangars:

  • Heavy duty steel frame

  • 3/4 HP, 36VDC drive system with 2:1 gear reduction and chain drive to the tires

  • Variable speed twist grip with 0 to 2 mph forward and reverse

  • Neutral throttle braking plus adjustable acceleration and braking

  • Battery discharge indicator and onboard charger

For key safety and control behavior, when the handlebars return to neutral, the unit comes to a quick, smooth stop and holds position with an electric brake style response. That matters when you are inches from a wall, a tool cart, or another aircraft.

Battery life that fits a full workday rhythm

  • About 8 hours of runtime when fully charged

  • About 8 hours to recharge after full discharge

  • The charger includes an automatic timer shutoff when batteries reach full charge

Translation: it is built around a practical shift-style workflow. Run it, plug it in, repeat.

Options that unlock more capability (and better fit)

No two operations are identical. That is why the Magic Arm 8K includes a strong list of add-ons depending on your aircraft mix, surface conditions, and how aggressive your repositioning needs are:

  • Nine tooth gear option for heavier planes, inclines, bumps. It increases torque by 2.5x and reduces overall speed

  • Winch options (manual or electric) for the setup you prefer

  • Foam-filled tires for shops that hate flats

  • Virtual Training to get operators confident quickly

  • Lithium Battery Option (contact us) for shops that want longer runtime and modern battery benefits

Fit check: two important notes before you buy

This is the part that saves everyone time.

The manual calls out two real-world constraints:

  1. Wheel pants can interfere. The Magic Arm 8K can power load your aircraft with an electric actuator, but it may not work if the aircraft nose wheel has wheel pants due to interference.

  2. Turning radius depends on the aircraft nose gear limits. The tug cannot magically exceed the aircraft’s steering geometry.

If your operation includes mixed aircraft types, this is exactly why a quick configuration call matters.

Pricing (for budget planning)

The standard unit pricing is $7,251.

Options vary based on how you configure the unit for your aircraft and surface conditions.

A simple payback mindset (no spreadsheets required)

Use this quick back-of-the-napkin method:

  1. Count how many aircraft moves you do per week (hangar in/out, staging, repositioning, maintenance shuffles).

  2. Estimate average time per move today.

  3. Multiply by how many people are typically involved.

  4. Multiply by your loaded labor rate.

Even shaving minutes off repeated moves can add up fast when the work is weekly and predictable.

Bottom line

If you are tired of tying up two people for routine aircraft positioning, the AircraftCaddy 8K Magic Arm is built to turn aircraft moves into a controlled, one-operator task, even in tight hangars and busy ramp environments.

Get the right configuration for your aircraft

Call 800-686-2651 or reach out with your aircraft make/model and nose wheel setup so we can match the best configuration and options.

Lithium Battery Upgrade for DJ Products Units: EPOCH 105Ah Packages

DJ Products now offers Lithium Battery packages on multiple unit configurations, with more options expanding soon. This upgrade is built for one thing: more work per charge, with clearer power visibility.

All 36V and 48V Units Now Have a Lithium Option

That means every DJ Products 36V and 48V unit can be upgraded with lithium power, giving customers longer runtime, smarter monitoring, and better performance across the workday.

What You Get with EPOCH 105Ah Lithium

The EPOCH 105Ah Lithium Battery is designed to perform as a primary power source or as a second battery option, with the features customers keep requesting:
  • 105Ah capacity for longer runtime
  • Built-in heater for cold environments
  • Bluetooth connectivity with the EPOCH app
  • Strong value for the performance

Compatible Unit Configurations

Lithium packages are currently available across multiple configurations, including:
  • 36V Sheet Steel Units
  • 3HP Sheet Steel Units
  • 3HP Chain Drive Units (3 Battery and 6 Battery options)
  • 48V Chain Drive Units (4 Battery and 8 Battery options)
  • TT Units (8 Battery option)

Updated Pricing for Lithium Options

  • 36V Sheet Steel Units – 60024936VLIT$3,646.30
  • 3HP Sheet Steel Units – 6002493HPLIT$3,717.70
  • 3HP Chain Drive Units (3 Battery) – 6002493HPCDLIT$3,613.85
  • 3HP Chain Drive Units (6 Battery) – 6002493HPCDLIT6$9,273.24
  • 48V Chain Drive Units (4 Battery) – 60024948VLIT$4,682.76
  • 48V Chain Drive Units (8 Battery) – 60024948VLIT8$11,597.39
  • TT Units (8 Battery) – 60024948VTTLIT8$9,984.19

Why Teams Upgrade to Lithium

  • Fewer interruptions with longer runtime
  • Smarter planning with Bluetooth battery visibility
  • Cold-weather readiness thanks to the built-in heater

Next Step

Want to upgrade your DJ Products unit with lithium power? Ask about the 36V or 48V lithium battery package that matches your configuration and we’ll get you set up.

Christmas Party at Rice Creek, Plus Fresh Used-Unit Deals Ready to Ship

December is all about wrapping up the year strong, celebrating the people who make it happen, and setting the stage for a fast start in the new year. At DJ Products, we did all three.

Christmas Dinner at Rice Creek

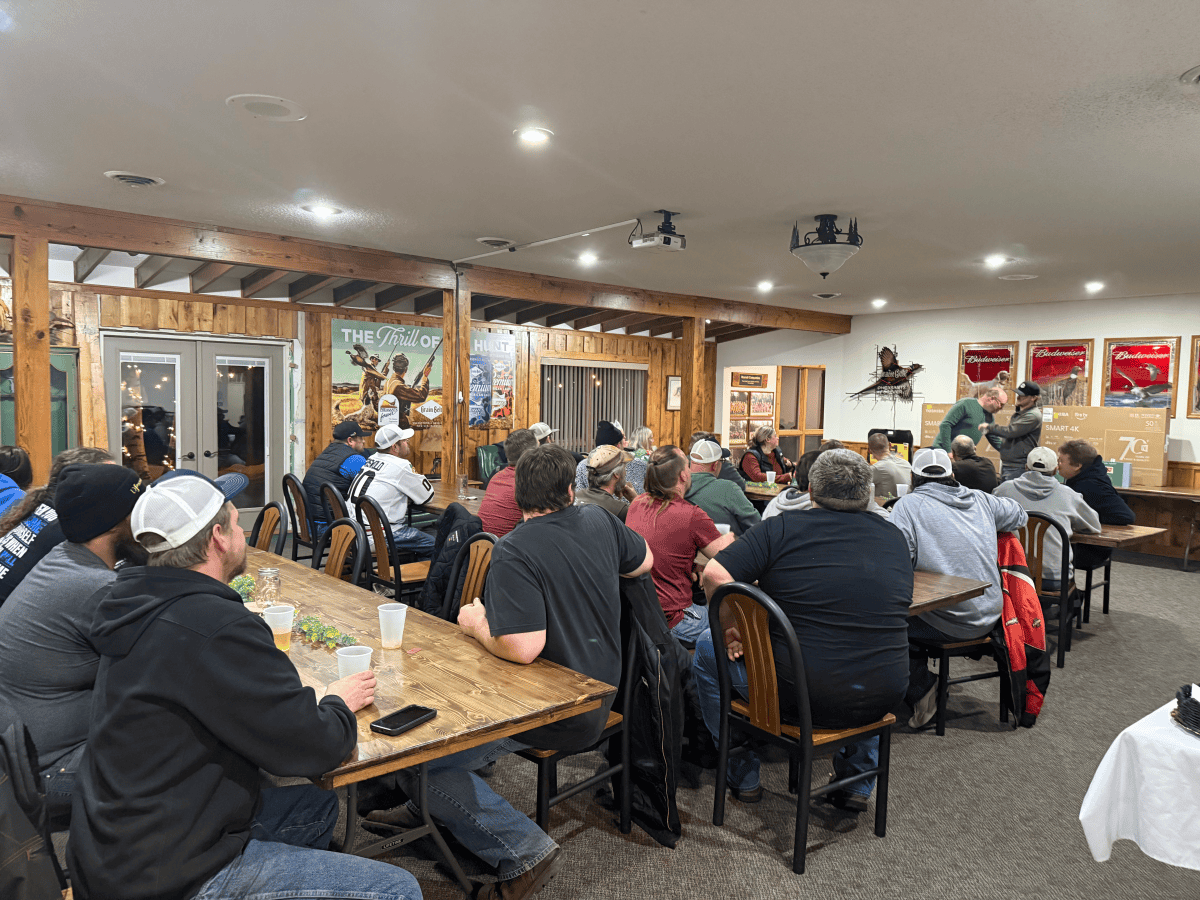
Our Christmas dinner at Rice Creek was the kind of night that reminds you why teamwork matters. Great food, lots of laughs, and a little holiday magic.
The star of the party was Barb, who showed up fully committed as Mrs Claus. Yes, Mrs Claus made an appearance, and the room absolutely loved it.
A few highlights from the night:
  • The food was wonderful (the kind of “seconds are mandatory” wonderful).
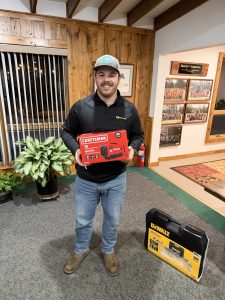
  • The raffle prizes were a big hit across the board.
  • Mrs Claus (Barb) brought the holiday energy and made the night unforgettable.

raffle prize tv raffle prize dewalt Mrs. Claus aka Barb raffle prize aura raffle prize craftsman

Big thanks to everyone who helped make it such a fun way to close out the year.

DJ Products Used Units: Discounted, Inspected, Serviced, Ready for Fast Shipment

We are excited to share our latest list of quality used units available at special discounted pricing. Every unit listed has been inspected and serviced and is ready for shipment almost instantly.
These units are limited, and availability is first come, first served.
If you see something you are interested in, reach out and we can provide:
  • Pictures
  • Specifications
  • Quotes
  • Option add-ons (as needed)
Note: Prices represent unit as-is. Other charges may apply for additional options.

Current Used Inventory

Waste Caddy’s
  • Waste Caddy HeavyDuty (326862): $8,904
  • Waste Caddy Lite (327675): $6,860
  • Waste Caddy HeavyDuty (328384): $10,381
  • Roll-Off Caddy 23K (328732): $42,880

Material Handling

  • 4SC Lite (326550): $7,689
  • Cart Caddy 6K 36V (327698): $14,242
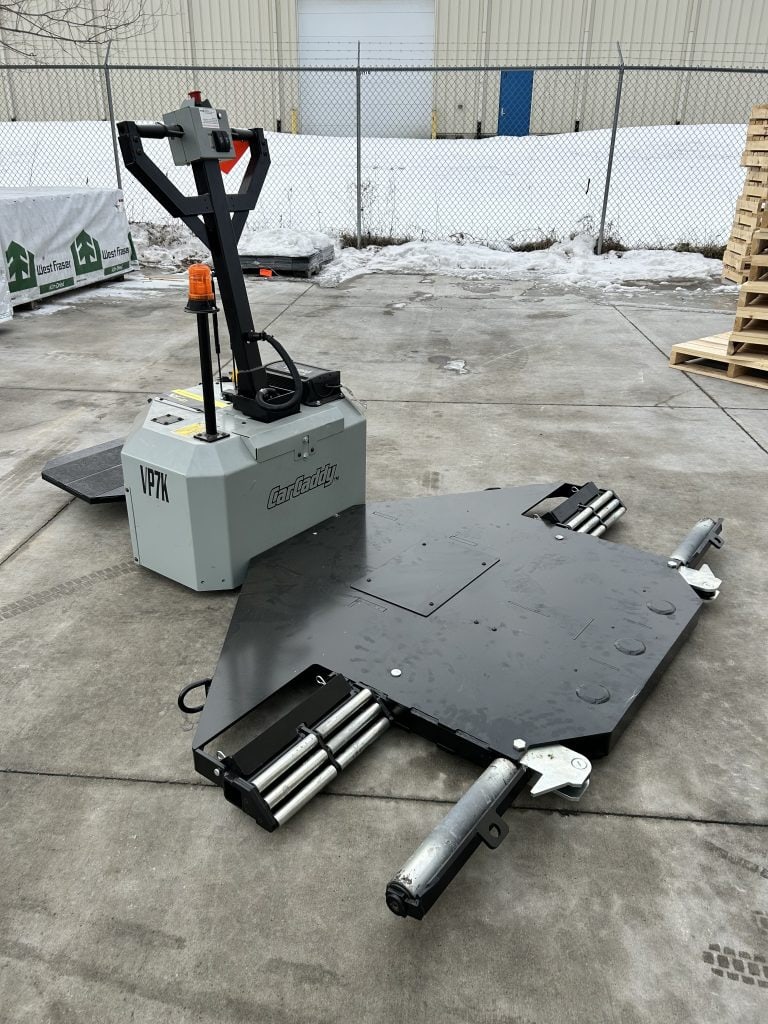
  • Vehicle Puller 7K Gray (324005): $21,578
  • Vehicle Puller 7K (323719): $20,710
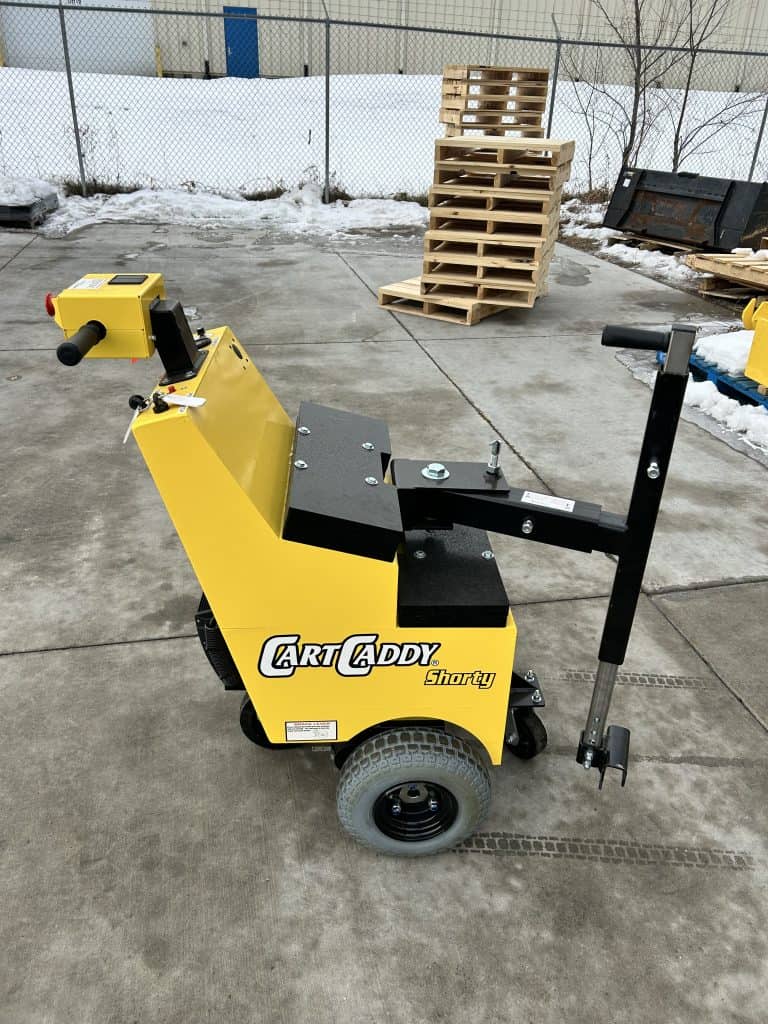
  • Shorty (327234): $7,894
  • Cart Caddy 6K 36V (328661): $18,018
  • Shorty (329038): $7,259
  • Cart Caddy 5W (328995): $9,819
  • Cart Caddy 5W (327510): $7,717
  • Cart Caddy 5W (328752): $9,983
  • 15K 48V Rail Car Caddy (328017): $36,474
  • Shorty (328540): $6,496
  • Cart Caddy Lite (327501): $4,896

Used VP7 Collector

Used Shorty

Trailer Caddy’s

  • 15K 48V Trailer Caddy (329015): $32,575
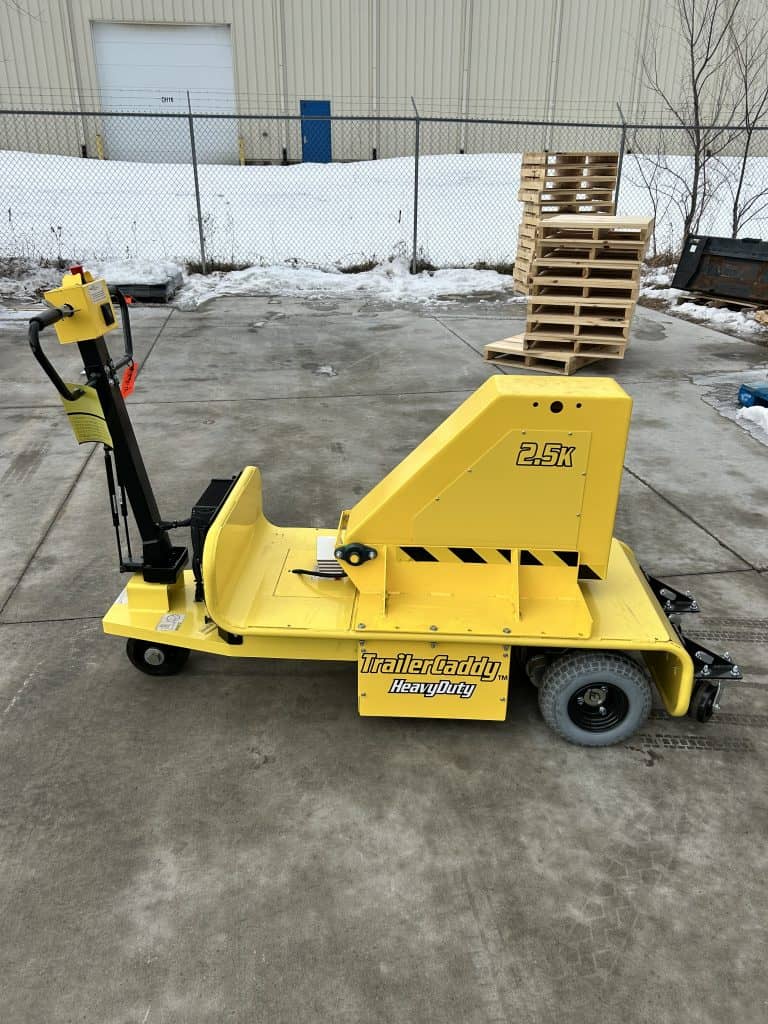
  • Trailer Caddy 2.5K (328842): $10,122

Used TC

Fast Start for the New Year

If your operation is planning upgrades, replacing an older unit, or adding capacity without a long lead time, these used units are a smart way to move quickly and control cost.
To reserve a unit or request details: contact us with the unit name and number in parentheses (example: Cart Caddy 6K 36V (327698)) and we will respond with availability, photos, and the next steps.

Meet the New Adjustable Spring Hitch: 12 Inches of Field-Adjustable Flexibility

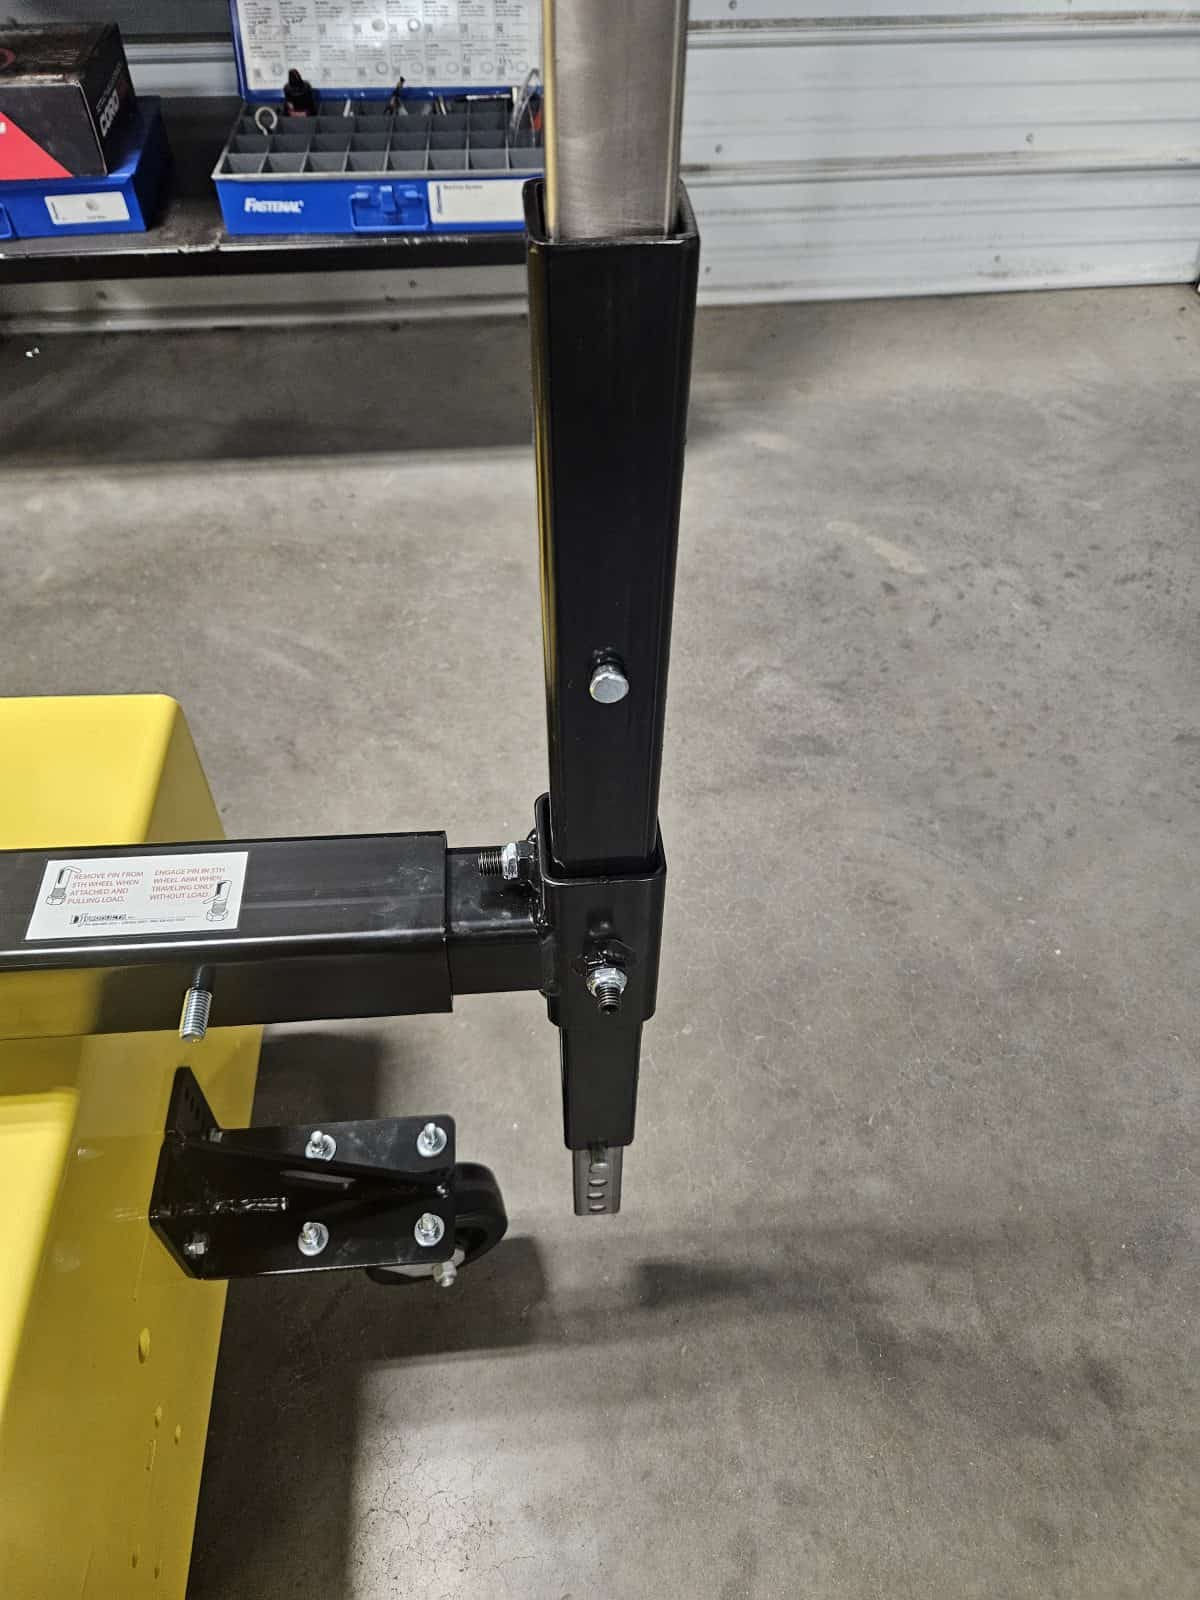
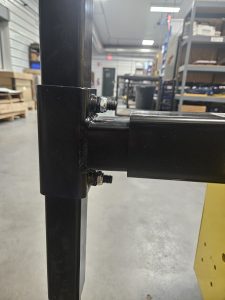
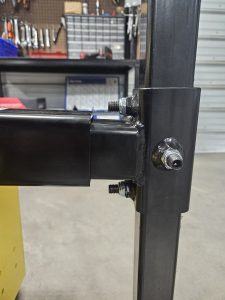
DJ Products is rolling out a new adjustable spring hitch that replaces our fixed, welded design. It delivers 12 inches of vertical adjustment and can be set in minutes with basic hand tools (a 3/4″ wrench) so your team can dial in the perfect hook height without welding, shims, or guesswork.

Why we built it

Material handling isn’t static. Dock plates change, bins vary, carts get swapped, and facilities evolve. A fixed-height, welded hitch forces you to adapt the fleet to the hardware. The new adjustable spring hitch flips that script:
  • One hitch, many heights: Up to 12″ of vertical travel to match different carts or bin lips.
  • No welding required: Loosen, slide, tighten… you’re done.
  • Less back-and-forth: No need to send dimensions when ordering a replacement; final fit happens on-site.
  • Keep moving: Once tightened, the spring action still works for quick, confident engagement.

new style spring hitch

How it works (fast)

  1. Install into the Fifth Wheel Arm on your DJ Products unit.
  2. Loosen the locking bolts with a 3/4″ wrench.
  3. Slide the inner spring‑loaded section to your required height.
  4. Tighten the bolts. The hitch remains fully functional.
  5. Hook and go. If your application changes, repeat the steps in minutes.
The spring‑loaded inner piece lifts to engage (commonly with a J‑hook), which helps compensate for small misalignments during daily operations.

Swap it in: retrofit‑ready

If you’re running a welded hitch today, you don’t need to fabricate a new one. Replace the welded assembly with this adjustable spring hitch and fine‑tune heights right in the field as needs change.
Compatible with any DJ Products unit using a Fifth Wheel Arm, including:
  • WasteCaddy and WasteCaddy Lite
  • CartCaddy 5W
  • CartCaddy Lite
  • CartCaddy Shorty
  • Select RiderCaddy configurations equipped with a Fifth Wheel Arm
(If your unit uses a Fifth Wheel Arm, this hitch is designed to fit.)

Quick specs

  • Adjustment range: 12 inches of vertical travel
  • Field setup: Basic hand tools; 3/4″ wrench for locking bolts
  • Mechanism: Spring‑loaded inner section for positive, repeatable engagement
  • Upgrade path: Direct retrofit for existing welded hitches

new style spring hitch 2 new style spring hitch 2

What this means for your operation

  • Fewer delays, less hassle: Keep maintenance in-house with quick height changes—no welding bay or outside fab required.
  • Standardize the fleet: One hitch style covers multiple cart/buffer heights across shifts and sites.
  • Future‑proofing: When carts or containers change, your hitch adapts with them.
  • Confidence at the hook: The spring action helps you line up and latch cleanly.

Field testing & rollout

We’re conducting initial field trials with five beta units placed at customer sites for roughly 30 days to monitor performance in real‑world conditions. Early feedback will continue to inform documentation and training resources as we complete the rollout across our product lines.

See it in action

FAQs

Does this replace the current hitch?
Yes. The new adjustable spring hitch replaces our fixed, welded design, and from now on it becomes the standard option across our lineup.

Will I need to provide measurements when ordering?
No. Since the hitch offers 12 inches of vertical adjustment, you can set the final height on-site… which means no measurements are needed during ordering.

What tools are needed?
You only need a 3/4″ wrench to loosen and tighten the locking bolts, so setup stays simple from start to finish.

How long does it take to adjust?
In most cases, adjustment takes only a few minutes. First you loosen the bolts, then you slide the hitch to the right height, and finally you tighten it back down so the unit can return to service quickly.

Which units are supported?
This hitch works with any DJ Products unit equipped with a Fifth Wheel Arm, including WasteCaddy, WasteCaddy Lite, CartCaddy 5W, CartCaddy Lite, CartCaddy Shorty, and select RiderCaddy configurations.

New Style 5th Wheel Arm Assembly Improves Strength and Control

At DJ Products, every design change has one goal: make our equipment stronger, easier to use, and more reliable for our customers. Our new style 5th wheel arm assembly is built to do exactly that. It’s heavier duty, cleaner looking, and replaces multiple older versions with one universal design.

Why We Made the Change

The 5th-wheel arm assembly is the pivot point that allows a unit to steer left and right once it’s connected to a load. For years, we used three different versions of this arm. Each came with its own set of parts, and over time, each developed too much play in the pivot. That “slop” led to more maintenance than we’d like to see.

The new-style arm replaces all three versions with one stronger assembly. That means less upkeep, less parts complexity, and better performance in the field.

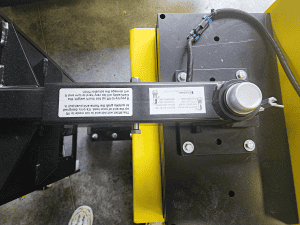
5th wheel arm over the top view

Key Improvements

Tighter tolerances
The pivot holds tight with minimal play, reducing sway and keeping loads steadier.

Tapered bearings
Built with tapered roller bearings on the pivot, the new arm is stronger and holds up under heavier use.

Adjustable crown nut
Operators can set how freely the arm pivots.. smoother and lighter for easy maneuvering, or tighter for more control under load.

Simpler, cleaner design
The assembly has fewer parts, a compact look, and is now robot-welded for consistency. This makes it easier for us to build and stock, and easier for customers to maintain.

5th wheel arm top view

Built From the Shop Floor

This redesign didn’t start in a conference room. A few years back, our welding lead and his team built a prototype out of spare parts during some downtime. It worked so well that it became the foundation for this new assembly. That kind of hands-on problem solving is what keeps our products moving forward.

Already in the Field

The new 5th wheel arm assembly is being tested on Waste Caddies, Waste Caddy Shorties, Cart Caddy 5Ws, & Cart Caddy Shorties. By replacing three separate designs with one universal version, we’ve made things easier for both our customers and our production team.

What Customers Should Know

  • The new arm is stronger than it looks.
  • It will replace all previous versions across our product lines.
  • Units in the field are already using it, with positive early results.
  • The new arm will bolt on-to existing units in the field.
  • The new arm will still accept existing attachments.

What’s Next

As soon as we finish using our existing stock of old assemblies, all DJ Products units will ship with the new style 5th wheel arm. Customers who want to upgrade existing equipment can make the switch as well.

The result is a 5th wheel arm assembly that’s stronger, tighter, and built to last… helping your team move loads with more stability and less maintenance.

Ready to upgrade or need specs for your application? Request a quote and Contact Sales and our team will match the arm to your unit and use case.

Molded Handlebar: Enhanced Ergonomics for Better Control

At DJ Products, we are always looking for ways to improve usability in our walk-behind tugs. Our equipment has always been built with safety, durability, and reliability in mind, and now we’re taking it a step further with a new ergonomic handlebar option that makes operation even smoother and easier. That’s where our Molded Handlebar comes in. 

What is a Molded Handlebar? 

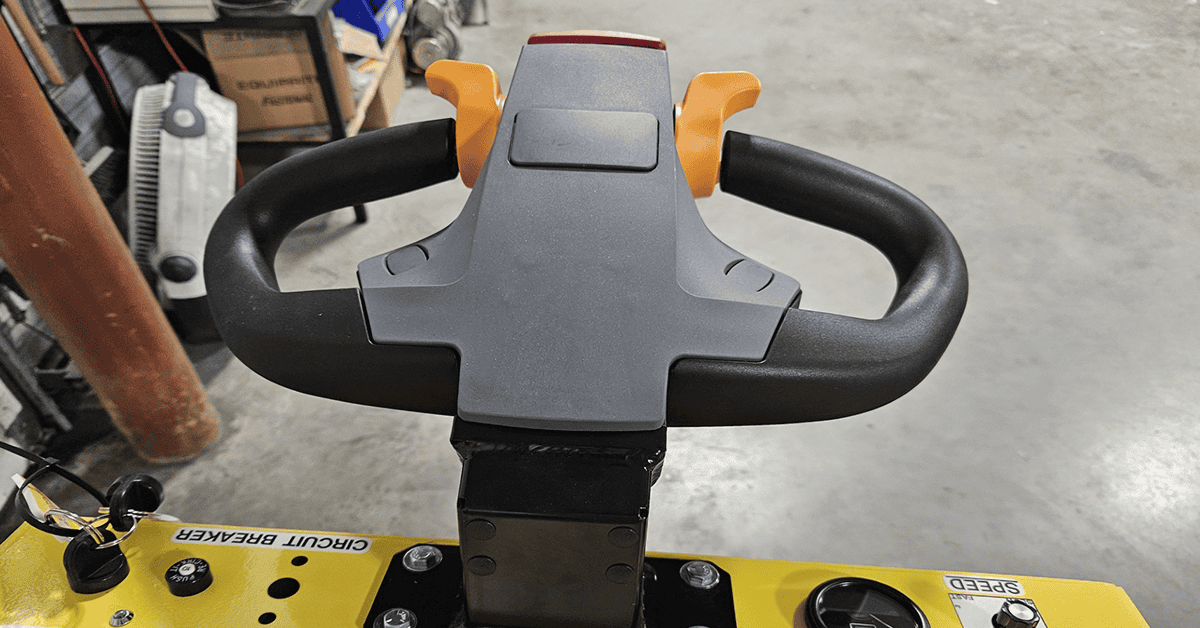
Our ergonomic handlebar upgrade makes operating our equipment easier and more user-friendly. While our traditional potentiometer system still serves our customers well, the new molded handlebar introduces a throttle cartridge that makes operation more intuitive and fine-tuned. This upgrade helps reduce maintenance needs, streamlines control, and enhances day-to-day usability. 

Have no fear, the Molded Handlebar also contains an emergency stop button. This feature ensures that operators can quickly halt the machine whenever necessary, giving an added layer of confidence and safety in any work environment. 

Why Our Customers Approve It 

  • Secure handling – The throttle is controlled by your thumbs, allowing for quicker navigation, especially in tight spaces. It moves forward or backward depending on the direction you push or pull it. 
  • Proportional throttle – The farther you push it, the faster the unit will move, giving you more accurate control with minimal effort. Its speed-matching attribute responds to how far you press, from light pressure for slow, controlled movement to full pressure for faster motion. 
  • No potentiometer = reduced maintenance requirements 

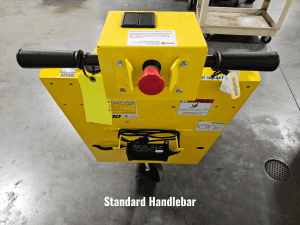
the old/standard handlebar Picture of a molded handlebar top view

From manual control to ergonomic ease (old meets the new 

Technical Compatibility 

Our molded handlebar is a great upgrade, but it will not be compatible with some of our units. It will not work on the following: 

  • Terminal Tractor Line 
  • Round Tube Frame models (like Parts Caddys or Wagon Caddys) 
  • EPC Models 
  • CarCaddy Push Frame units 
  • Old tube frame styles 
  • Units equipped with a service air brake option 

Our team will happily assist you and answer your questions about whether your unit can be upgraded. We are here to help you verify compatibility as well. 

Tested in the Field 

The molded handlebar upgrade can now be found across several of our product lines, including: 

Customers report reduced strain, smoother handling, and greater confidence in operation. The molded design keeps control simple and reliable, helping extend equipment life while making it easier for operators to do their jobs effectively. 

Misconceptions About the New Design 

We sometimes hear that the molded handlebar “looks too simple,” but don’t let that fool you. It’s not cheap or flimsy. It’s engineered for strength, tested for durability, and trusted by operators who prefer it for day-to-day use. Think of it like switching from a manual crank to a modern push-button control. Same power, less hassle. 

Key Takeaway 

Our molded handlebar is a smart move as long as your model supports it. If you are looking for a smoother, more comfortable, and secure way of operating your DJ Products units, our optional molded handlebar is the perfect choice. Ready to make the switch? Call us today for a free demo at 1-800-686-2651 or download our brochure here.